How to use the Accessibility Checker in Microsoft Office
The Accessibility Checker is available in Microsoft Word, Excel, Outlook, OneNote, and PowerPoint. To use it: Launch a Microsoft Office program.
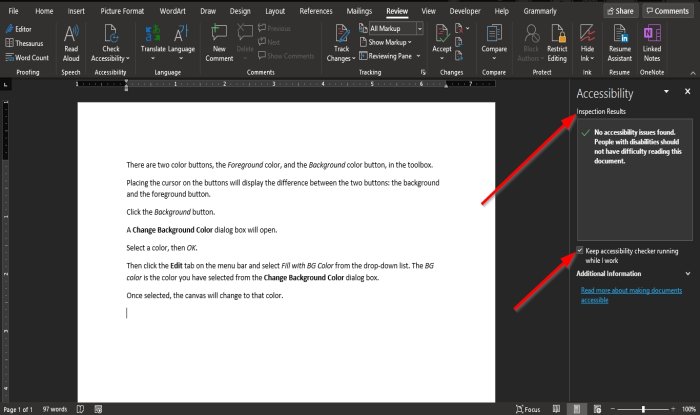
Click the Review tab. Click the Accessibility Checker button in the Accessibility group. In the drop-down list, click Check Accessibility.
An Accessibility pane will appear on the right. In the Accessibility pane, the inspection results showcase that no accessibility issues were found, and people with disabilities should have difficulty reading the document. In the Accessibility pane, there is a check box for Keep accessibility checker running while I work; if this check is ticked, it will run the Accessibility Checker automatically.
The other method of checking the Keep accessibility checker running while I work checkbox is to click the Accessibility Checker in the Accessibility group and select the Options: Ease of Access.
A Word Options dialog box will open. You will see the checkbox checked for Keep accessibility checker running while I work in the dialog box. If not checked, click the checkbox. In Outlook, it is a lot different; The Accessibility Checker is automatic when composing an email. We hope this tutorial helps you understand how to use the Accessibility Checker in Microsoft Office. Read next: Amazing Windows 10 Accessibility Features for Differently abled.