How to Save A Search in Windows 11/10
If you want to browse files quickly, you can use the Windows Explorer Search feature. If you think you might repeat the same search in the future, you can save Windows Explorer search results. We will show you how to do this.
How to save Windows Explorer Search Results by creating a Shortcut in Windows 11/10
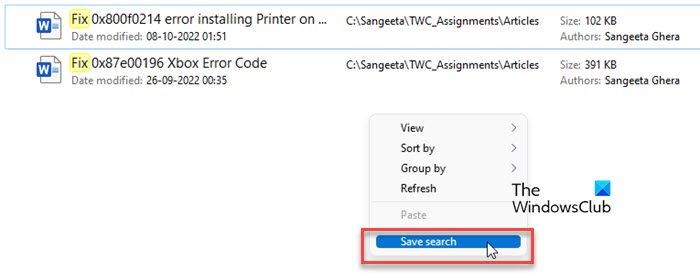
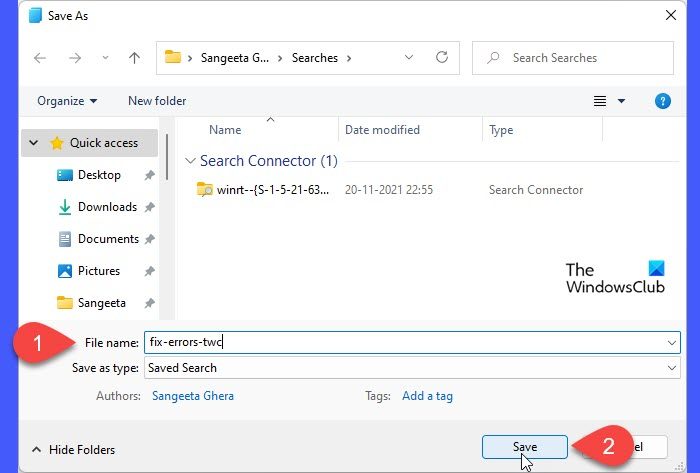
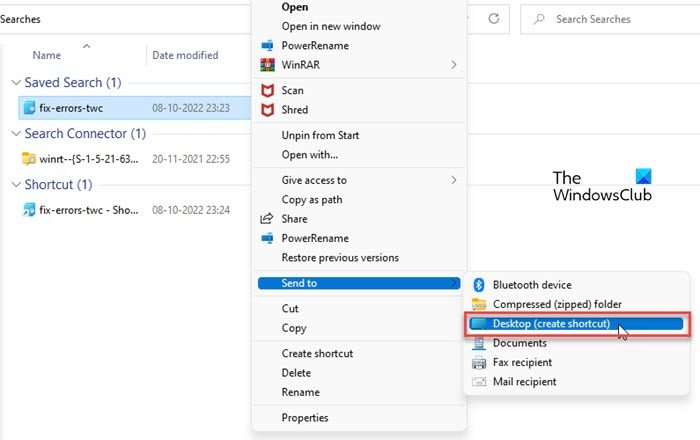
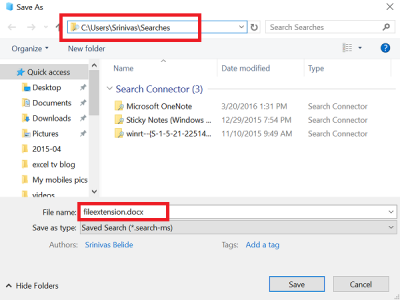
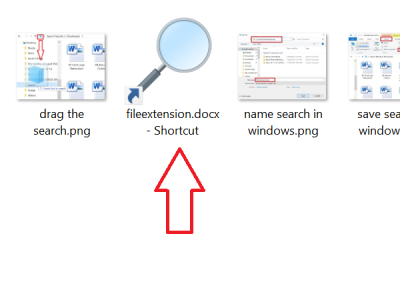
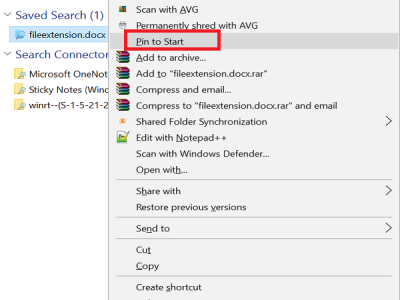
Your File Explorer searches are saved at C:\Users[user_profile]\Searches by default. You can create a desktop shortcut for these searches to access them anytime in the future. Here’s how you can do this: A shortcut to quickly launch the search will appear on your desktop. When you click on this shortcut anytime in the future, the results will be updated to include all new files that match the search query. Tip: You can also pin the search to your Start button menu by right-clicking on the saved search and selecting the Pin to Start option. This is how you can save Windows Explorer search results. Hope you find this interesting. Keep reading our blogs for more Windows tips and tricks. Do not forget to share your feedback or queries in the comments section below. Read:
How to save/export Windows Explorer search results as a TXT or CSV file?
You can save or export Windows Explorer search results to a Notepad or Excel file. This allows you to save the exact paths of the search results for future reference. Here’s how to do it:
How to save a Search in Windows 7
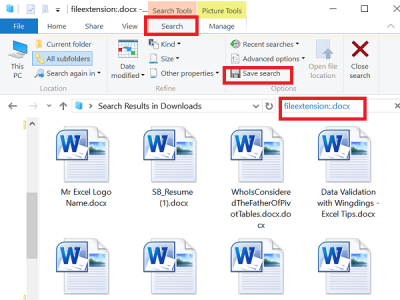
If you want to search certain types of files regularly, then it is advised to save the search for easy access. Saving the Search does not depend on the number of parameters you have added or where you perform the search. It is very simple and easy and let us see how it is done. Perform the search in any File Explorer with the parameters you want. Now, you will see the “Search” tab, and under it, “Save Search”. Click on Save Search.
Give it the name you want so that you can identify the search parameters easily. By default, it gets saved in “C:\users<username>\Searches” folder in Windows 11/10/8. In Windows 7, saved searches are found in “Favorites” folder. But you can save the search anywhere you want.
You can also save the search by dragging the icon present in the address bar to the location where you want.
If you save the search by doing so, then Windows will create the shortcut to the search. Double-clicking on the shortcut will perform the search.
So, when you want to search for a file that meets the criteria of the saved search, just double-click on the saved search. This will fire the search in the file explorer and you can see the search results.
Pin the Saved search to Start Menu
Now, here comes the handy feature in Windows 10. If you are using Windows 10, then you can pin the saved search to the Start menu. Right-click on the search you have saved and click “Pin to Start” from the options shown in the context menu. You can see the pinned search in the Start menu. This is the way to save a search on a Windows PC.
Where are Windows Searches stored?
The search queries in the Windows File Explorer can be saved using the Save Search feature in Windows 11/10. This feature saves the query in XML format in a virtual folder called the Search Folder. The XML file contains information such as what to search for, where to search, and how to present the search results. When you open a Search Folder, it runs the query and displays fresh results, including new files and folders that match the search criteria. By default, it gets saved in “C:\users<username>\Searches” folder in Windows 11/10. Read Next: Best free Windows Search Alternative Tools for Windows 11. This post will show you how to delete Windows Search History or re-create deleted Searches folder.


