What is a Table in Excel?
OK, so a Microsoft Excel table is a rectangular-shaped range of data that has been given a name and defined in a certain way. A typical table will contain rows, columns, and headers. If you’ve seen a lot of tables before, then you should have an idea of what we’re talking about.
What is 3D Maps in Microsoft Excel?
For those wondering, the Microsoft 3D Maps feature located in Excel is a three-dimensional data visualization utility that makes it possible for users to view the information in new ways. We like this tool because it lets users discover insights they might not see when a traditional two-dimensional table and charts are used.
How to format a table in Excel
When users create a table in Excel, they do not have to go through the grueling work of manually formatting said table. Instead, it is possible to use any of the predefined tables the software has in its arsenal. The following information should open your eyes a great deal:
1] Open Microsoft Excel
The very first thing you’re going to do here is to open Excel. You can do this by clicking on the Windows key, then scroll down until you come across the Excel icon. Click on it to launch the program. Alternatively, check on the desktop or taskbar to see if the icon is there, then select it to open. Once that is done, please open a new document or an existing one in order for us to move forward.
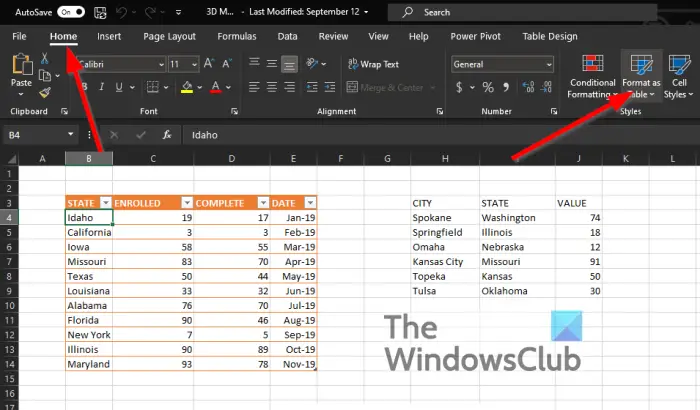
2] Select a cell within your data
In terms of creating a table, the easiest way is to select one of the cells, then from there, be sure to click on Home > Format as Table located above. A dropdown menu should appear with several styles of tables to choose from.
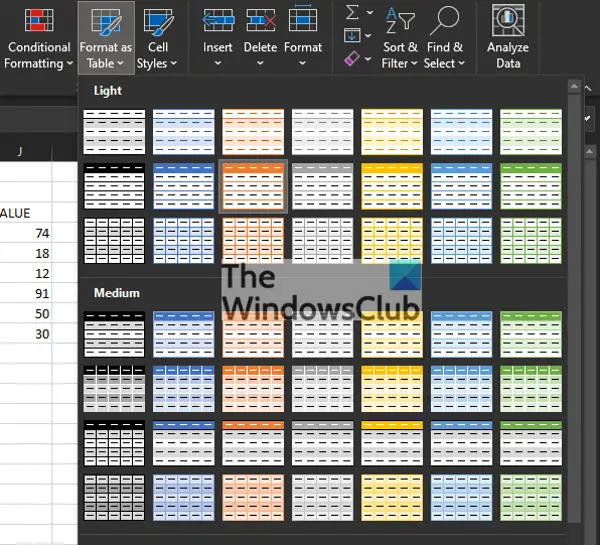
3] Choose a style for your table
When it comes down to choosing a style for your table, you can select from many free options available. At the moment, there are only three categories in the forms of Light, Medium, and Dark. If the default options are not up to your alley, you can even create a New Table Style or New Pivot Table Style. Once you’ve selected the preferred style, you can drag to increase or decrease the columns and rows if you wish.
4] Add data to your table
From the newly created table, you must go on ahead and add relevant data to the table. Be sure to add headers to make things more seamless in the future.
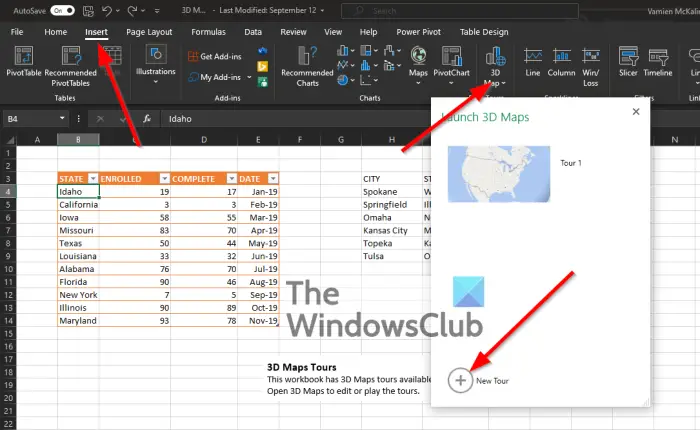
5] Create a basic 3D map
OK, so when it comes down to creating a 3D map, the task is simple. You see, after creating your table, go on ahead and select Insert, and from there, go to 3D Map and click on it. The next step then is to choose Open 3D Maps > New Tour. Right away, you should see the appearance of a globe with all the table data within it.
6] Customize your 3D Map
When it comes down to customizing the 3D Map to your liking, we must say it’s not hard, though it could take some time to get things right. To make changes, look to the Add Layer section. Here you can add Height, Category, or Time. Look above on the menu bar for options to change the theme of the Map, among other things. Read: How to use the DELTA function in Microsoft Excel.